James III of Scotland: The King Who Lost His Kingdom, Fled the Battlefield, and Died in Mystery
James III of Scotland (1451/1452–1488) | King of Scots, 1460–1488 | Defeated by rebels fighting under the banner of his own son at the Battle of Sauchieburn | Died on June 11, 1488, probably during or immediately after his flight from the battlefield, with later chronicles describing his deliberate murder
The King Who Rode Away From His Last Battle
On June 11, 1488, James III of Scotland went to war against an army that marched beneath the banner of his own son. The king had spent nearly three decades on the throne, survived aristocratic conspiracies, watched some of his closest favorites dragged from a bridge and hanged before his eyes, imprisoned members of his own family, and repeatedly struggled against nobles who believed he trusted the wrong men and governed in the wrong way. Now those conflicts had converged near Stirling, where two Scottish armies prepared to decide whether James would continue to rule. Somewhere among the rebels was the fifteen-year-old prince who would become James IV before the day was over.
The battle took place near Sauchieburn, close to Bannockburn and within sight of landscapes already heavy with Scottish historical memory. James’s forces were defeated, and the king disappeared from the battlefield during the collapse. What happened next has fascinated chroniclers for centuries because the surviving evidence becomes frustratingly uncertain at exactly the moment when the story becomes most dramatic. James was alive when the battle began, and by its aftermath he was dead.
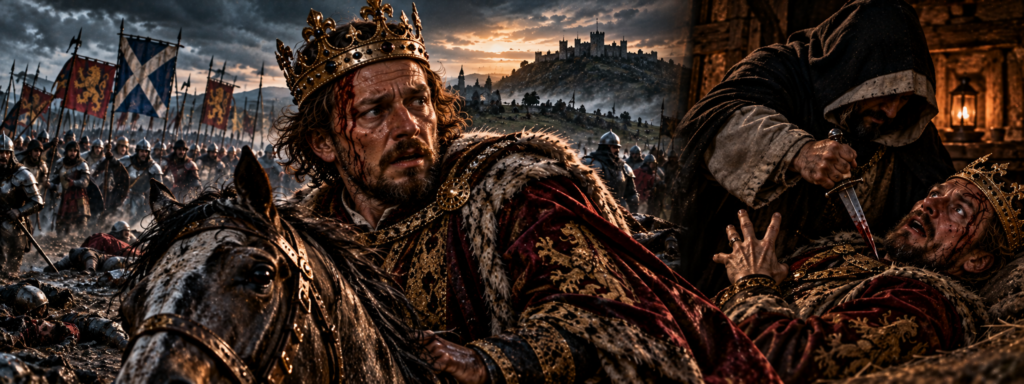
Later Scottish chroniclers supplied an unforgettable ending. According to the most famous version, James fled the battlefield on horseback, fell near a mill at Beaton’s Mill or Milton, and was carried into a nearby house. Injured and frightened, he supposedly asked for a priest, only for a man connected with his enemies to enter under the guise of a clergyman and stab him to death. Other versions differ in important details, and none can be treated as an eyewitness account of unquestionable reliability.
The safest conclusion is darker precisely because it is less certain. James died during or immediately after the defeat at Sauchieburn, and there are substantial historical grounds for believing that he was deliberately killed rather than simply dying unnoticed from battlefield wounds. Yet we cannot identify his killer with confidence, reconstruct his last conversation, or prove the famous story of the disguised priest. The king’s death sits in the murky territory between battlefield casualty, political assassination, and later legend.
What is not mysterious is the political disaster that placed him there. James III had spent years alienating powerful sections of the Scottish nobility while cultivating men whom aristocratic critics considered low-born favorites. His relationship with his brothers became poisonous. His financial policies caused resentment, his foreign ambitions often seemed disconnected from the priorities of his magnates, and his handling of opposition repeatedly turned political disagreement into personal hostility.
Yet the traditional portrait of James as an incompetent, cowardly, effeminate king surrounded by worthless favorites is itself heavily shaped by hostile sources and later political propaganda. He was interested in art, music, architecture, diplomacy, and the projection of royal magnificence. He pursued ambitious ideas about kingship and attempted to strengthen the monarchy. Some characteristics condemned by later chroniclers may tell us as much about aristocratic expectations of masculinity and kingship as they do about James himself.
His tragedy was not simply that he was a bad king overthrown by better men. It was that he became increasingly isolated from the political community whose cooperation Scottish kingship required. His enemies learned to present rebellion not as treason against the crown but as resistance to the men supposedly corrupting the crown. Eventually, they went further and placed the king’s own heir at the head of their movement.
That transformed rebellion into something far more dangerous. James could punish rebellious nobles, but fighting an army associated with his son created a dynastic crisis from which victory was uncertain and defeat could be fatal. When his forces broke at Sauchieburn, he was no longer merely a king retreating from battle. He was a defeated monarch whose enemies possessed another Stewart ready to wear his crown.
By sunset, James III was dead. His son became James IV. The rebels who had marched against an anointed king became servants of the new monarchy, and the precise circumstances of the old king’s death were never established beyond dispute. Scotland had acquired a new ruler, but it had also acquired one of its most haunting royal murder mysteries.
A Child King Inherits a Dangerous Crown
James was born in 1451 or 1452, the eldest surviving son of James II of Scotland and Mary of Guelders. He belonged to a dynasty in which kings repeatedly inherited the throne as children and grew up surrounded by powerful nobles competing for influence. His grandfather, James I, had been assassinated at Perth in 1437 when James II was only six years old. James III would experience another abrupt royal death before reaching adolescence.
James II was a forceful monarch who struggled against the immense power of the Black Douglas family. His confrontation with William, eighth Earl of Douglas, became notorious when the king personally killed the earl at Stirling Castle in 1452 after a bitter meeting. The monarchy eventually broke Douglas power, strengthening the crown but reinforcing the Stewart dynasty’s tradition of violent confrontation with its magnates. Royal authority in fifteenth-century Scotland was never merely ceremonial.
James II died unexpectedly in August 1460 during the siege of Roxburgh Castle. A cannon exploded near him, killing the king while Scottish forces were attempting to recover the fortress from English control. His death left his young son James as king at approximately eight years old. Once again, Scotland had a child monarch.
The minority initially placed considerable responsibility upon Queen Mary of Guelders. She was politically capable and worked to protect her son’s interests while navigating relations among the Scottish nobility. Her position helped provide stability during the first years of the reign. Yet her death in 1463 removed another important adult protector while James was still a boy.
Power then shifted among competing aristocratic factions. The young king became the focus of struggles between men who sought influence over the government and access to royal patronage. Such experiences were common for medieval child monarchs, but they could shape later attitudes toward nobles who had once treated the king as a political possession. James would eventually attempt to assert himself more forcefully.
The political environment he inherited was difficult but not hopeless. Scotland possessed functioning royal institutions, a parliament, an established monarchy, and powerful regional families whose interests could often be reconciled with those of the crown. Successful kings needed to balance those interests rather than simply crush them. James’s eventual failure would come partly from losing that balance.
His reign therefore began with vulnerability rather than tyranny. The child who later became notorious for distrusting his nobles first experienced government as something controlled by adults around him. Before James could alienate the aristocracy, members of that aristocracy had already demonstrated how easily a young king could be manipulated.
The Boyd Family Seizes the King
One of the most dramatic episodes of James’s minority involved the Boyd family. Robert Boyd and his allies rose rapidly in influence during the 1460s and effectively seized control of the young monarch. In 1466, James was taken at Linlithgow in an episode that later political proceedings treated as an unlawful seizure of the king’s person. The Boyds then dominated government.
Robert Boyd became an important figure at court, while his son Thomas received extraordinary advancement. Thomas Boyd married James’s sister Mary, linking the family directly to the royal dynasty. For a time, the Boyds appeared to have converted possession of the king into lasting political power. Their rise was spectacular.
The young James’s personal attitude toward the Boyds during these years is difficult to determine. Later actions suggest that he eventually resented or rejected their dominance, but reconstructing the private feelings of an adolescent monarch requires caution. What can be seen clearly is that their political position depended heavily upon control of access to him. Once James began exercising independent authority, that position became vulnerable.
The Boyd regime also negotiated James’s marriage to Margaret of Denmark, daughter of Christian I of Denmark and Norway. The marriage agreement would have enormous territorial consequences. Because Christian could not immediately provide the full dowry, Orkney and Shetland were pledged as security. They ultimately became incorporated into the Scottish crown’s territories.
Margaret arrived in Scotland and married James in 1469. She was still very young, but the marriage connected Scotland to the Scandinavian royal world and eventually produced several children, including the future James IV. The acquisition of Orkney and Shetland became one of the most enduring territorial developments associated with James III’s reign. Whatever his later political failures, the kingdom expanded significantly during his kingship.
The Boyds did not survive the transition to James’s personal rule. Their enemies moved against them, and the family was accused of treasonable conduct connected with the seizure of the king. Robert Boyd fled, while Thomas Boyd also remained outside Scotland and lost his position. The marriage between Thomas and Princess Mary was eventually dissolved.
The fall of the Boyds taught another harsh lesson about royal politics. A family could rise to enormous power by controlling a young king and collapse once that king no longer needed them. James had spent his youth surrounded by nobles who treated access to his person as a route to wealth and influence. His later preference for men outside the traditional magnate elite becomes more understandable against that background, even if it proved politically disastrous.
Margaret of Denmark and the Royal Marriage
Margaret of Denmark became queen of Scotland in 1469 and remained James’s consort until her death in 1486. The marriage is sometimes overshadowed by the political crises surrounding her husband, but Margaret occupied an important position within the Stewart dynasty. She gave birth to the heir, James, in 1473, followed by other sons. The succession therefore appeared secure.
Later chroniclers sometimes contrasted Margaret favorably with James, portraying her as sensible, dignified, or morally superior to her husband. Such descriptions must be handled carefully because hostile accounts of James could use praise of the queen as another means of criticizing the king. Evidence for the private state of their marriage is limited. It is unsafe to turn later gossip into a detailed portrait of marital unhappiness.
Margaret’s Danish background nevertheless enhanced the international character of the Scottish court. Her marriage connected James to continental royal culture at a time when he displayed strong interests in art, ceremony, architecture, and diplomacy. The court James sought to build was not necessarily provincial or isolated. He appears to have imagined Scottish monarchy within a broader European framework.
The queen’s dowry settlement also transformed the map of the kingdom. Orkney and later Shetland were pledged because Christian I could not provide the full promised payment. The Scottish crown eventually retained the islands. Their acquisition was not the result of conquest but of dynastic diplomacy.
James’s reign therefore contained genuine successes that later narratives of incompetence can obscure. The territorial gain was substantial, the royal succession was secured, and Scotland remained an independent kingdom navigating relationships with England, France, Denmark, and other European powers. The king’s political imagination extended beyond domestic aristocratic feuds. His problem was that domestic aristocratic feuds could not be ignored simply because he preferred other concerns.
Margaret’s death in July 1486 removed an important figure from the royal family shortly before the final crisis of James’s reign. Later tradition sometimes suggested that she had acted as a moderating influence between the king and his opponents. The evidence is insufficient to prove that her survival would have prevented rebellion. Nevertheless, her death left James without his queen as political tensions intensified.
Within two years, her eldest son would be placed at the head of a rebellion against his father. The marriage that had strengthened James’s dynasty ultimately produced the prince around whom his enemies could organize. Dynastic security became the instrument of dynastic overthrow.
A King Who Preferred Artists to Warriors?
One of the most persistent accusations against James III concerns the men he chose as companions and advisers. Hostile chroniclers claimed that he preferred architects, musicians, craftsmen, and other supposedly low-born favorites to the great nobles of Scotland. Names such as William Scheves, Thomas Cochrane, and others became associated with a court portrayed as socially inappropriate and politically corrupt. The criticism reveals both genuine tensions and aristocratic prejudice.
James certainly possessed cultural interests unusual enough to attract comment. He valued music, artistic production, architecture, astrology, and intellectual pursuits. William Scheves, who became Archbishop of St Andrews, was associated with medicine, astrology, and learning. James’s court therefore reflected interests that did not conform neatly to the ideal of a warrior king surrounded exclusively by martial nobles.
Later writers sometimes treated these preferences as evidence of weakness or effeminacy. Such judgments reflect the values of chroniclers who expected kings to demonstrate military leadership, aristocratic fellowship, and conventional masculine behavior. A monarch who spent time with musicians or architects could be mocked precisely because those activities challenged expectations. Cultural sophistication became a political weapon when opponents wanted to portray James as unfit.
The social status of his favorites also mattered. Powerful nobles expected access to the king because aristocratic hierarchy formed the foundation of political society. If James promoted men of lesser birth while excluding magnates, the issue was not merely snobbery. Royal access determined offices, land, patronage, and influence. A favorite could become powerful enough to threaten established interests.
Thomas Cochrane became the most notorious example. Later accounts describe him as an architect or mason who rose through James’s favor and acquired the earldom of Mar. The exact details of his origins and role have been debated, and hostile chroniclers almost certainly exaggerated aspects of his story. What mattered politically was the perception that James had elevated an unsuitable favorite above hereditary nobles.
That perception became explosive because it offered aristocratic opponents a justification for rebellion. They could claim that they were not resisting the king himself but rescuing him from corrupt advisers. This rhetorical strategy appeared repeatedly in medieval politics. Attacking royal favorites allowed rebels to present treason as loyal service.
James may have believed that men dependent upon royal favor were safer than great magnates with independent territorial power. If so, the reasoning was understandable. A musician, administrator, or architect could not normally command the private armies available to a great earl. Yet by trusting such men, James insulted the nobles whose military support he still needed.
The king therefore created a dangerous political contradiction. He wanted advisers who depended upon him because he distrusted magnates capable of challenging him. The magnates interpreted their exclusion as proof that the king was being misgoverned. Eventually, they would destroy the favorites and turn against James himself.
Brothers Beneath the Crown
James’s relationship with his younger brothers became another source of instability. Alexander Stewart, Duke of Albany, and John Stewart, Earl of Mar, possessed royal blood and considerable status. Brothers of medieval kings could become valuable supporters, but they could also become dangerous alternative claimants. James increasingly regarded them with suspicion.
John, Earl of Mar, died in 1479 or 1480 under circumstances that later attracted dark rumors. Some hostile accounts alleged that James was responsible for his brother’s death, sometimes describing grotesque methods involving bleeding or confinement. The evidence does not establish that James ordered Mar’s murder. The stories belong to the hostile tradition surrounding the king and should not be repeated as proven fact.
Alexander, Duke of Albany, presented a more obvious political challenge. His relationship with James deteriorated, and he was eventually imprisoned before escaping and seeking support in England. Albany’s willingness to cooperate with the English king Edward IV dramatically escalated the conflict. A royal brother backed by England could become a genuine threat to James’s throne.
In 1482, Albany entered into an agreement with Edward IV that contemplated his becoming king of Scotland under English overlordship. The arrangement demonstrates that opposition to James could move beyond domestic criticism into direct dynastic treason. Albany was prepared to challenge his brother’s kingship with foreign support. James therefore had legitimate reasons to regard him as dangerous.
The conflict also coincided with an English invasion led by Richard, Duke of Gloucester, the future Richard III. Scottish political division had created an opportunity for English intervention. James’s relationship with his nobles deteriorated dramatically during the campaign. The crisis would culminate at Lauder Bridge.
The rivalry between the brothers reveals why James’s distrust cannot simply be dismissed as paranoia. He did face genuine threats from men of royal blood. Yet his methods of managing those threats often created additional hostility. Fear of betrayal encouraged policies that produced more reasons for betrayal.
James had inherited a dynasty in which close relatives repeatedly became rivals. His grandfather had destroyed powerful Stewart cousins, and his father had personally killed a great magnate. James’s own brothers could plausibly replace him if enough nobles supported them. Family was never merely family when a crown stood between brothers.
Lauder Bridge: The Day the Nobles Hanged the King’s Favorites
In 1482, James gathered an army to confront the English threat. Instead of producing unity, the campaign exposed the depth of aristocratic hostility toward his government. At Lauder, leading nobles turned against the king’s favorites. The resulting episode became one of the most famous humiliations of James’s reign.
Later chronicles describe the nobles seizing Thomas Cochrane and other royal companions and hanging them from Lauder Bridge. The story accumulated vivid details, including contemptuous exchanges and symbolic attacks upon Cochrane’s expensive clothing. As with many dramatic medieval episodes, individual flourishes should be treated cautiously. The central event, however, reflects a genuine aristocratic coup against the king’s circle.
James himself was placed under restraint and taken to Edinburgh Castle. The king who had attempted to avoid dependence upon great nobles now found himself effectively their prisoner. His favorites had been eliminated in front of him or as part of the same political seizure. The humiliation echoed the vulnerability of his childhood.
The rebels justified their actions by attacking supposedly corrupt advisers rather than openly declaring war upon the monarchy. This allowed them to present themselves as defenders of good government. The king was portrayed as misled rather than immediately illegitimate. Removing the favorites could therefore be represented as an act of political correction.
Yet the distinction between controlling a king and rebelling against him was thin. James understood that nobles had demonstrated their willingness to seize his person and kill men under his protection. Even if he regained freedom, trust would be extraordinarily difficult to restore. The coup made future reconciliation less likely.
The English invasion added another layer of humiliation. Richard of Gloucester occupied Edinburgh, while Albany attempted to position himself as an alternative ruler. The political crisis threatened both James personally and Scottish independence. Yet Albany ultimately failed to replace his brother permanently.
James recovered his authority, and Albany’s position deteriorated. For a time, the king appeared to have survived another serious threat. But Lauder changed the political atmosphere permanently. The nobility had discovered that collective action could overpower the king.
James, in turn, had discovered that his enemies could reach the people closest to him. The memory of his favorites hanging while aristocratic rebels controlled his person could only deepen his distrust. The next major rebellion would not stop with the king’s advisers.
The Strange Survival of James III
After the catastrophe of 1482, James managed to recover more effectively than might have been expected. Albany’s alliance with England damaged his standing among Scots who might otherwise have supported opposition to the king. James gradually reasserted authority. His brother’s challenge faded, although political tensions remained.
This recovery demonstrates that James was not entirely incompetent. A truly powerless monarch might have been permanently deposed during the Lauder crisis. Instead, he maneuvered through the aftermath and remained king for another six years. His opponents were divided, and James retained supporters of his own.
The king also benefited from changes in England. Edward IV died in 1483, followed by the political upheaval that brought Richard III to the throne. England’s capacity and priorities shifted. Albany could no longer rely upon exactly the same external environment. Scottish politics became less immediately vulnerable to his challenge.
James continued pursuing diplomatic and dynastic projects. His foreign policy included interest in continental marriages and alliances, while his court maintained the cultural interests for which he became known. The reign after Lauder was not simply six years of continuous collapse. Royal government continued functioning.
Yet the underlying political problem remained unresolved. James had not rebuilt deep trust with major sections of the aristocracy. The humiliation of 1482 had shown both sides what the other was capable of doing. The king knew his nobles could rebel, and the nobles knew the king might seek revenge or exclude them from power.
This atmosphere encouraged suspicion. Every dispute over land, offices, royal revenues, or access to the king could acquire greater significance. James’s attempts to strengthen his position could be interpreted as preparation for retaliation. Noble resistance could appear to the king as evidence of another conspiracy.
The monarchy therefore survived without achieving reconciliation. James had escaped the crisis but not solved it. By the late 1480s, a new coalition of opponents was forming, and this time they possessed something Albany had failed to secure permanently: control of the king’s heir.
The Prince Who Became a Weapon Against His Father
James’s eldest son, the future James IV, was born in March 1473. As heir to the throne, the prince represented continuity for the Stewart dynasty. He also represented an obvious alternative to his father. Any rebellion that could obtain custody or cooperation of the prince could claim to defend legitimate monarchy rather than destroy it.
By 1488, the prince was approximately fifteen years old. The exact degree of his willing participation in the rebellion against his father remains debated. Later James IV reportedly expressed guilt over his role in the events and adopted acts of penance, including the famous tradition that he wore an iron chain around his waist and increased its weight over time. The evidence for particular penitential practices must be evaluated carefully, but his association with the rebellion clearly troubled his later reputation.
The rebels benefited enormously from having the heir among them. They could insist that they were protecting the prince from corrupt influences or securing his future against the king’s policies. James III could no longer dismiss his opponents as men seeking to overthrow the Stewart dynasty. They had a Stewart prince at their head.
For the king, the situation was emotionally and politically devastating. Fighting the rebels meant fighting an army associated with his own son. Defeating them might require capturing or humiliating the heir. Losing to them could mean deposition or death.
The prince’s presence also undermined James’s ability to rally support through simple appeals to dynastic loyalty. A noble could oppose James III while claiming loyalty to the future James IV. The rebellion therefore split the concept of monarchy itself. Father and son represented competing centers of royal legitimacy.
It is important not to imagine the fifteen-year-old prince as the sole architect of the uprising. Experienced nobles controlled much of the political and military strategy. The prince was extraordinarily valuable precisely because of who he was, regardless of how much independent authority he exercised. His presence gave adult rebels a dynastic shield.
James’s enemies had learned from earlier crises. Removing favorites had not permanently changed the government, and supporting Albany had involved an adult claimant compromised by English connections. The king’s son offered a far more powerful alternative. If James III disappeared, succession could occur immediately without abandoning the dynasty.
The Road to Rebellion
The final rebellion emerged from a mixture of grievances rather than one dramatic event. James’s relations with powerful nobles remained poor, particularly among magnates who believed they had been excluded from influence or threatened by royal policy. Disputes involving land, offices, taxation, and royal favorites contributed to the atmosphere. The king’s personality and style of government magnified these conflicts.
Among the rebels were important nobles from southern and central Scotland. Their exact motives varied. Some may have feared James’s plans for revenge after earlier opposition, while others sought greater influence over government. Political coalitions rarely consist of men driven by identical grievances.
James attempted to mobilize support of his own. He was not universally abandoned, and significant nobles remained loyal. The final conflict should therefore not be described as Scotland rising unanimously against a hated king. It was a civil war between competing aristocratic coalitions, each associated with a member of the royal family.
The king’s opponents gained possession of the prince, allowing them to claim legitimacy. James sought military resources from regions and magnates still loyal to him. The contest increasingly became one that could not be resolved through ordinary political negotiation. Both sides prepared for armed confrontation.
James also attempted to secure strategic positions, particularly around Stirling. Stirling Castle was one of the most important royal fortresses in Scotland. Control of it could provide both military advantage and symbolic authority. The king’s relationship with those controlling access to the castle became critical.
The rebels maneuvered effectively enough to prevent James from establishing an overwhelming advantage. The king eventually gathered his forces and moved toward the confrontation that would decide the struggle. By June 1488, the competing armies were near Stirling.
The tragedy had now become dynastic in the most literal sense. On one side stood the reigning king. On the other stood men fighting beneath the banner of his son. Whatever happened on the battlefield, the Stewart monarchy would survive, but one of the two Jameses was likely to emerge politically destroyed.
Sauchieburn: Scotland Divided Between Father and Son
The Battle of Sauchieburn was fought on June 11, 1488, near Stirling. The exact deployment of forces and sequence of fighting are not documented with the precision available for some later battles. The surviving accounts were influenced by the political outcome and by later efforts to explain James’s death. Nevertheless, the battle clearly ended in defeat for the king.
James had supporters from several parts of the kingdom, and his army was not necessarily doomed from the beginning. The rebels, however, possessed experienced nobles and the immense symbolic advantage of the prince. Both sides understood that the conflict concerned more than temporary political influence. The future of the reign was at stake.
The landscape itself carried powerful historical associations. Bannockburn, where Robert the Bruce had defeated Edward II’s English army in 1314, lay nearby. More than a century later, Scots were again fighting in the region, but this time the enemy was not an invading English king. Scottish forces faced one another in a dynastic civil conflict.
Later traditions sometimes portray James as personally cowardly or unwilling to fight. Such depictions fit the hostile image of a king supposedly more interested in art and astrology than warfare. They should not be accepted uncritically. James had participated in military affairs before, and his presence with an army at Sauchieburn itself contradicts the simplest caricature of complete cowardice.
What can be said is that the royal army broke. Once defeat became apparent, James left the battlefield. Whether he fled in panic, withdrew in an attempt to reach safety and continue resistance, or was carried away by the collapse of his forces cannot be established precisely. Medieval kings commonly withdrew from lost battles because capture could end a dynasty.
The king’s destination was probably connected with the hope of reaching a secure position. Stirling Castle would have been an obvious refuge if accessible. Other loyal territories might also have offered possibilities. James was still king as long as he remained alive and free.
That fact made his survival dangerous to the rebels. A defeated king could raise another army, seek foreign support, punish defectors, and reclaim authority. The civil war would not necessarily end merely because James had lost one battle. His death, by contrast, would solve the rebels’ greatest problem immediately.
Somewhere during the flight from Sauchieburn, James III ceased to be a defeated king and became a dead one. The evidence allows us to trace the political logic surrounding his death far more clearly than the physical act itself. That uncertainty is the heart of the mystery.
The Flight From the Battlefield
Later chroniclers describe James fleeing Sauchieburn on horseback after realizing that his army had been defeated. The route traditionally associated with his flight took him toward the area of Bannockburn and Milton. According to the famous story, his horse was startled, throwing him to the ground near a mill. The fall supposedly left him injured but alive.
The injured king was then carried into a nearby house, often identified in later tradition as belonging to a miller. There he allegedly revealed his identity and asked for spiritual assistance. Someone went outside seeking a priest. The request, according to the story, brought the king’s killer directly to him.
This account has been repeated so often that it can sound like established eyewitness history. It is not. The most detailed versions come from chronicles written after the event, and they differ from one another. Their authors had access to traditions that may preserve genuine information, but they also wrote within political and literary contexts that encouraged dramatic storytelling.
The fall from the horse is plausible. A defeated army created chaotic roads, frightened animals, wounded soldiers, and rapid movement. A king attempting to escape could easily suffer an accident. Yet plausibility is not proof.
The same caution applies to the miller’s house. James may indeed have reached shelter after leaving the battlefield. His body had to end up somewhere, and local memory may have preserved aspects of the event. However, we cannot reconstruct the interior of the building with confidence.
What is historically significant is that James did not reappear alive after Sauchieburn. He did not reach a secure fortress, summon another army, or negotiate surrender. His enemies quickly gained control of the political situation. The prince became king.
The disappearance of James between battlefield and confirmed death created the perfect environment for stories of murder. A king who vanished during retreat and was later found dead invited questions. Those questions became more dangerous because the men benefiting from his death had just fought against him.
The Priest With the Knife
The most famous version of James III’s death describes an assassin pretending to be a priest. According to this tradition, the injured king lay inside the house after his fall and requested a confessor. A man arrived claiming to fulfill that role. Instead of hearing the king’s confession, he stabbed him.
The story possesses extraordinary dramatic power. A dying monarch asks for the sacrament of confession and receives an assassin instead. The sacred office of priest becomes a disguise for regicide. For medieval and early modern storytellers, the moral horror would have been obvious.
Several versions identify the supposed killer differently or leave him unnamed. Some connect the act with followers of the rebel lords. Later writers attempted to assign responsibility to particular individuals, but the evidence does not allow a confident identification. The uncertainty becomes greater rather than smaller as the story is examined closely.
There is also the possibility that James died from wounds sustained during the battle or his flight. A serious fall from a horse could itself be fatal, particularly if accompanied by battlefield injuries. Contemporary medicine offered limited ability to treat internal trauma. The king’s death therefore does not require an assassin to be medically plausible.
Yet political circumstances make deliberate killing equally plausible. The rebels had an obvious interest in preventing James from escaping. A living king could challenge the legitimacy of the prince’s new regime. Men pursuing the defeated royal army may have sought James specifically.
Some historians have therefore treated assassination as probable without accepting the disguised-priest story literally. This is a reasonable distinction. James may have been deliberately killed after Sauchieburn even if later chroniclers invented or embellished the precise method. Political murder does not depend upon the authenticity of every dramatic detail.
The responsible conclusion is that James died violently or under suspicious circumstances immediately after his military defeat, while later accounts specifically alleged murder. We cannot state with certainty who delivered the fatal blow. We should not present the false priest’s knife as proven fact.
That uncertainty makes the episode more unsettling rather than less. James’s enemies gained everything they needed from his death, while the precise person responsible disappeared into the confusion of civil war. Scotland changed kings almost immediately, leaving the dead monarch’s final minutes suspended between history and legend.
Was James III Murdered?
The simplest answer is that he may very well have been, but absolute certainty is impossible. James’s death occurred in circumstances that strongly encouraged political killing. He had just lost a battle against rebels supporting his son, and his survival would have threatened their victory. Eliminating him would transform a temporary military success into a dynastic settlement.
The surviving narratives provide explicit traditions of murder rather than merely reporting that the king died in battle. That distinction matters. Medieval chroniclers close enough to the political culture of the period believed that James’s death required explanation beyond ordinary battlefield casualty. Their accounts cannot be dismissed simply because the details vary.
At the same time, those chronicles are not equivalent to modern forensic evidence. None provides an unquestionable eyewitness account of the killing. Political propaganda after James IV’s accession could influence how the event was remembered. Later authors could also embellish stories already circulating orally.
James IV’s own behavior adds another layer of complexity. The new king appears to have experienced lasting concern over his involvement in the rebellion against his father. Traditions of penitence developed around him, including the claim that he wore an iron chain as an act of continuing repentance. Such behavior suggests that his father’s death was morally and politically troubling even if the young king had not ordered it.
There is no secure evidence that James IV instructed anyone to murder his father. He was only fifteen and operated within a rebellion led largely by experienced nobles. To transform his participation into a deliberate patricide would go far beyond the evidence. His guilt may have concerned the fact that his rebellion created the circumstances in which his father died.
Likewise, responsibility cannot automatically be assigned to every rebel leader. Men who benefited from James’s death may not all have known how it occurred. Civil wars generate violence that can exceed the plans of political leaders. A pursuing soldier or local opponent could have killed the king without a formal assassination order.
James III therefore belongs within a category of rulers whose deaths sit on the boundary between battle and assassination. He was killed or died during the immediate aftermath of a rebellion designed to remove him from power. Later traditions explicitly described murder. The precise mechanics remain unresolved.
For an Assassinated Rulers & Regicides history, that uncertainty is not a weakness in the story. It is part of the story itself. James died at the exact moment when his enemies had the greatest reason to ensure he never returned, and the truth of what happened vanished almost as quickly as the king.
James IV Becomes King
The prince who had marched with the rebels became James IV immediately after his father’s death. He was fifteen years old. The succession was remarkably smooth considering that it followed a civil battle and the suspicious death of the reigning monarch. The rebels’ possession of the heir had achieved exactly what made their movement so politically dangerous.
James IV would eventually become one of the most celebrated Stewart kings. He was energetic, charismatic, militarily ambitious, interested in science and culture, and capable of cultivating relationships with both nobles and foreign powers. His reign would last twenty-five years. It ended catastrophically at the Battle of Flodden in 1513.
The contrast between father and son influenced later interpretations of James III. Because James IV became a successful and popular monarch, the rebellion that placed him on the throne could be portrayed retrospectively as the removal of a failed ruler. Victors rarely lack explanations for why their victory was necessary. James III’s reputation suffered accordingly.
The new regime had obvious reasons not to investigate the old king’s death too aggressively. If prominent supporters of James IV had participated directly in murder, exposing them could destabilize the government. The political priority was consolidation, not forensic reconstruction. The dead king could not challenge the official settlement.
Parliamentary language after the rebellion had to navigate the awkward reality that men now serving the crown had taken up arms against the previous king. Political narratives therefore emphasized grievances against James III’s government and justified the actions of the victorious faction. Responsibility for the violence could be reframed within the legitimacy of the new reign.
James IV’s personal sense of guilt complicates this convenient political story. Whatever official justification existed, the son knew that he had stood with the army opposing his father on the day his father died. Later traditions remembered that burden. The crown he inherited was inseparable from Sauchieburn.
The new king’s success could never entirely erase the manner in which he gained power. Every triumph of James IV rested upon the fact that his father had been defeated and killed while he was still a teenager. The Stewart dynasty continued, but its continuity had been purchased through civil war.
The Iron Chain of Penance
One of the most famous stories about James IV holds that he wore an iron chain around his body as penance for his role in the rebellion that led to his father’s death. According to later accounts, he added weight to the chain periodically, increasing the burden as the years passed. The image became a powerful symbol of royal guilt. A son who had gained a crown through his father’s destruction literally carried the weight of that death.
James IV was certainly religiously observant in ways typical of late medieval monarchy, and penitential behavior formed part of contemporary devotional culture. The tradition of the iron chain therefore fits the world in which he lived. Yet specific details about its weight and annual additions should be treated with caution. As with the story of James III’s disguised-priest assassin, later chroniclers shaped memory into vivid images.
Even if embellished, the tradition reveals how contemporaries and later generations understood James IV’s relationship with Sauchieburn. His accession could not be separated morally from his father’s death. The prince may not have wielded the weapon, but his participation in the rebellion helped make the fatal confrontation possible. Medieval concepts of responsibility could extend beyond the person who struck the blow.
The guilt was particularly powerful because the victim was not simply a king. He was James IV’s father. Christian teachings concerning obedience to parents intensified the moral implications of rebellion. The young king had violated both dynastic hierarchy and family hierarchy, even if he believed he had been manipulated or acted for political reasons.
Later writers could use the chain to rehabilitate James IV. A king who sincerely repented could remain admirable despite the circumstances of his accession. Penance transformed youthful rebellion into a moral wound rather than an unforgivable crime. It allowed the successful monarch to acknowledge the past without surrendering legitimacy.
The story also ensured that James III remained present throughout his son’s reign. The dead king became the invisible weight carried by the living one. Every year of James IV’s success could be accompanied symbolically by another reminder of the battlefield where his crown had been won.
Whether the chain existed exactly as later tradition described it matters less than the political memory it represented. Scotland remembered Sauchieburn not merely as a change of rulers but as a family tragedy. A father had died, a son had become king, and no amount of later success could make the transition entirely clean.
The Reputation of an Unpopular King
James III acquired one of the darker reputations among Scotland’s Stewart monarchs. Chroniclers portrayed him as weak, suspicious, unjust, dominated by favorites, uninterested in warfare, and alienated from the natural aristocratic leadership of the kingdom. Some even attacked his masculinity by contrasting his cultural interests with the martial behavior expected of kings. These judgments influenced historical writing for centuries.
Modern scholarship has treated that tradition more cautiously. Many of the surviving narratives were written by people influenced directly or indirectly by the political world that overthrew James. A regime born from rebellion had obvious incentives to portray the defeated king as unworthy. Criticism therefore needs to be evaluated rather than simply repeated.
James’s cultural interests, for example, were not inherently signs of incompetence. Renaissance courts across Europe increasingly valued music, art, architecture, scholarship, and elaborate ceremony. A Scottish king participating in those trends could be seen as sophisticated rather than frivolous. The problem arose when cultural patronage became politically associated with favorites whom nobles despised.
His preference for peace or diplomacy over aggressive warfare can also be interpreted differently. Medieval chroniclers often admired warrior kings, but avoiding unnecessary conflict could be rational statecraft. Scotland’s resources were limited, and war with England could be devastating. James’s reluctance to satisfy aristocratic expectations for military glory was not automatically cowardice.
At the same time, revision should not become rehabilitation without limits. James clearly experienced repeated breakdowns in relations with important nobles. He faced major rebellions in 1482 and 1488. His brother sought foreign assistance against him, his favorites were violently removed, and his own son became the figurehead of the final uprising.
Those events indicate genuine political failures. A successful medieval king needed to manage aristocratic expectations whether or not those expectations were reasonable. James repeatedly failed to create a durable coalition around his monarchy. His interests and policies may have been defensible, but his political management proved disastrous.
His reign is therefore best understood through contradiction. James was neither the ridiculous weakling of hostile legend nor an enlightened Renaissance prince tragically misunderstood by barbarians. He was an ambitious, culturally interested monarch with serious political weaknesses. His inability to manage opposition eventually destroyed him.
That more balanced portrait makes his death more meaningful. James was not simply punished for incompetence. He became the victim of a political system in which royal authority depended upon relationships he had allowed to collapse. Once those relationships failed, even an anointed king could find himself alone on a road after a lost battle.
The Favorites: Scapegoats or Symptoms?
The men surrounding James became convenient explanations for everything that went wrong during his reign. Thomas Cochrane in particular was transformed into the archetype of the arrogant low-born favorite who corrupted the king and insulted the nobility. His dramatic execution at Lauder seemed to confirm the idea that removing favorites could restore proper government. Yet the persistence of conflict after their deaths shows that the problem ran deeper.
Royal favorites often became targets because they concentrated access and patronage. A noble denied an office might blame the man whispering into the king’s ear rather than the king himself. This allowed criticism to remain nominally loyal. The monarch could be portrayed as deceived by evil advisers.
James may also have used favorites deliberately to reduce his dependence upon established magnates. Men whose status came entirely from royal patronage had strong incentives to remain loyal. Great earls with hereditary lands and private followings could survive outside royal favor. From the king’s perspective, the supposedly inappropriate favorites may have seemed safer.
The strategy failed because government could not operate solely through personal loyalty. Scotland’s major nobles controlled territories, military forces, local networks, and family alliances that the crown needed. Excluding them did not make their power disappear. It encouraged them to cooperate against the men who replaced them.
The execution of Cochrane and others in 1482 demonstrated the limits of favorite-based government. James could elevate men, but he could not always protect them. Once the magnates acted collectively, the favorites lacked the independent resources necessary to resist. Their dependence upon the king became a fatal weakness when the king himself was restrained.
Yet removing them did not restore political harmony. James’s distrust of the nobles intensified, while the nobles had demonstrated their willingness to use violence. The favorite controversy was therefore a symptom of a deeper problem: neither king nor magnates trusted the other enough to share power securely.
By 1488, the rebels no longer needed to claim that removing a handful of advisers would solve everything. They had the king’s son. The conflict had moved beyond favorites to the question of whether James himself should continue ruling.
A Father at War With His Heir
The presence of Prince James among the rebels turned the final confrontation into one of the most painful dynastic conflicts in Scottish history. Medieval kings frequently fought brothers, cousins, uncles, and nephews, but rebellion by an heir carried particular significance. The future of the monarchy had become an active weapon against the reigning monarch. James III faced not merely political opposition but his own replacement.
The prince’s youth makes the situation especially complicated. At fifteen, he was old enough to understand much of what was happening but young enough to be heavily influenced by experienced nobles. It is unlikely that he independently designed the rebellion. His importance lay primarily in the legitimacy his presence supplied.
Later accounts sometimes portray him as reluctant or manipulated. That interpretation may reflect attempts to protect the reputation of the successful James IV. It is equally possible that the prince had genuine grievances or fears concerning his father. The evidence does not allow us to reconstruct his private motives with confidence.
James III may have regarded the seizure or allegiance of his son as the ultimate betrayal. A father could forgive political opposition more easily if his heir remained securely within the royal household. Once the prince stood with the rebels, every military decision became entangled with family. Capturing the rebel army might mean capturing his own child.
The rebels benefited from this hesitation whether or not they intended it. Their cause could be framed as the protection of the heir and future of Scotland. James III’s supporters, by contrast, had to fight fellow Scots who could claim loyalty to the dynasty. The moral lines of civil war became deliberately blurred.
The Battle of Sauchieburn resolved the contradiction brutally. Father and son did not negotiate a lasting settlement. The father’s army was defeated, and the father died. The son became king.
James IV would spend the rest of his life unable to separate his accession from that sequence. Whether or not he wanted his father dead, he received the crown because James III did not survive the battle. The distinction between intention and consequence could not erase the connection.
Who Benefited From James III’s Death?
The immediate beneficiaries were obvious. The rebel nobles no longer faced retaliation from a surviving king. Prince James inherited the throne. The civil conflict ended without the need to negotiate James III’s restoration or imprisonment. The political landscape simplified almost instantly.
This does not prove that rebel leaders ordered the king’s murder. Historical reasoning must distinguish motive and benefit from evidence of direct responsibility. Many people benefit from unexpected deaths without causing them. In the chaos following a medieval battle, individual acts could occur without centralized planning.
Yet the motive for ensuring James’s death was undeniably powerful. If he escaped, he could seek support in northern Scotland, appeal to foreign allies, or exploit divisions among the rebels. His presence would cast doubt upon every action taken in his son’s name. Two living kings could create prolonged civil war.
A dead James eliminated those possibilities. His son could be proclaimed without ambiguity, and nobles could transfer allegiance to the new monarch. The rebellion ceased to be rebellion once its figurehead became the lawful king. Death transformed treason into government with remarkable speed.
This political convenience contributed to later suspicions. People naturally asked whether the king’s enemies had merely benefited from his death or deliberately arranged it. The colorful assassination stories supplied an answer. A disguised killer sent to finish the wounded monarch fit the logic of the political situation perfectly.
The problem is that perfect political logic is not proof. The truth may have been less theatrical. James could have been killed by pursuing soldiers who recognized him, murdered by local men, fatally injured in his fall, or wounded during the battle and unable to survive. Several possibilities fit the limited evidence.
The identity of the killer, if there was one, therefore remains beyond recovery. What survives is the unmistakable fact that the new regime had little incentive to reopen the question. James III’s death solved the central problem facing the rebels. Asking too many questions about how that solution occurred could only make their victory more dangerous.
Regicide Hidden Inside a Battle
James III’s death occupies an unusual place in the history of regicide because battle provided political cover for whatever happened afterward. A king who dies during civil war can be described as a battlefield casualty even if someone deliberately kills him during flight. The chaos makes intention difficult to establish. That ambiguity can protect perpetrators.
Other murdered monarchs died in towers, prisons, palaces, or on public scaffolds where the political nature of the killing was unmistakable. James disappeared into the confusion following military defeat. There was no formal execution, surviving death warrant, or universally accepted eyewitness account. His death could therefore be absorbed into the battle itself.
Yet the distinction mattered politically. Killing a king deliberately remained a grave act. Rebels could justify armed resistance more easily than they could openly admit to regicide. If James happened to die during the conflict, the new regime could inherit power without formally accepting responsibility for murder.
The later assassination stories may represent memories of an uncomfortable truth that official politics preferred to obscure. They may also represent storytellers attempting to explain an otherwise mysterious death. Both possibilities remain open. Historical caution requires acknowledging them simultaneously.
The result is a death that belongs naturally within the history of assassinated rulers while retaining an asterisk of uncertainty. James was unquestionably a king destroyed by violent rebellion. He unquestionably died during or immediately after his defeat. Later sources specifically described him as murdered.
What cannot be said with equal confidence is exactly where the murder occurred, who committed it, or whether the killer posed as a priest. Those details belong to the realm of plausible but unproven tradition. Presenting them as certainty would turn a fascinating mystery into false precision.
James’s case reminds us that regicide does not always leave paperwork. Political murder can occur in the space between battlefield and refuge, carried out by men whose names disappear before chroniclers begin asking questions. Sometimes the most consequential killing in a kingdom happens without anyone ever successfully proving who held the weapon.
The Body of the Fallen King
James III was buried at Cambuskenneth Abbey near Stirling, beside Queen Margaret. The abbey stood close to the region where his final political struggle unfolded. His burial returned him to the royal and religious landscape surrounding the kingdom’s central strongholds. The king who died fleeing rebellion was given the dignity of royal interment.
His tomb did not prevent his reputation from deteriorating. The victorious regime and later chroniclers had little reason to celebrate the father whom James IV had helped overthrow. Stories of bad advisers, cowardice, strange interests, and political incompetence accumulated around him. His reign became a cautionary tale.
Centuries later, historical interest in James became more sympathetic. Scholars examined administrative records, diplomacy, coinage, artistic patronage, and the political biases of narrative chronicles. The resulting portrait proved far more complicated than the traditional caricature. James’s government had ambitions and achievements alongside its failures.
His surviving artistic legacy is particularly intriguing. The famous Trinity Altarpiece by Hugo van der Goes includes portraits associated with James III and Margaret of Denmark, offering a rare visual connection to the royal family. James appears not as the grotesque weakling of hostile chronicles but as a late medieval Christian monarch presented within sophisticated European art. The contrast between image and written reputation is striking.
The king’s interest in projecting royal status can also be seen in coinage and symbolism. James experimented with representations of monarchy that reflected broader European developments. These interests were politically meaningful rather than merely decorative. Royal imagery helped communicate authority.
Yet no artistic image could compete with the story of his death. The fallen horse, the miller’s cottage, the request for a priest, and the hidden assassin became far more memorable than administrative reform or Renaissance patronage. Like many murdered rulers, James became imprisoned within his final hours.
His body was buried, but the question surrounding it remained alive. Did James die from wounds and accident, or did someone make certain that the defeated king would never rise again? More than five centuries later, the answer remains just beyond reach.
The Son Who Surpassed the Father
James IV’s later success inevitably affected how his father’s reign was remembered. The young king proved skilled at cultivating nobles, projecting royal magnificence, and participating enthusiastically in the martial culture James III had supposedly neglected. He embraced tournaments, ships, artillery, pilgrimage, diplomacy, and Renaissance learning. His court became one of the most dynamic in Scotland’s history.
In some ways, however, James IV shared more with his father than hostile comparisons suggest. He also valued culture, science, technology, architecture, music, and international diplomacy. The difference was not that the son was a warrior while the father cared only about art. James IV managed to combine cultural patronage with the aristocratic performance of kingship more successfully.
That distinction mattered enormously. Great nobles could accept a cultivated king if he also hunted, fought, traveled, dispensed patronage, and treated them as essential members of the political community. James IV understood the social theater of monarchy. His father often appeared to resist it.
The son also benefited from the lesson provided by his father’s destruction. He knew what could happen when a king became isolated from his nobles. Whether consciously or not, his style of government addressed many of the weaknesses that had undermined James III. He cultivated personal relationships across the kingdom with remarkable energy.
Yet James IV’s reign ended in another catastrophic battle. In 1513, he invaded England and was killed at Flodden along with a devastating number of Scottish nobles. The king who had inherited his crown through his father’s battlefield defeat ultimately died on a battlefield himself. Stewart history retained its taste for violent symmetry.
The difference was memory. James IV became celebrated as a heroic king killed fighting England. James III became remembered as the unpopular king who fled Scots fighting beneath his son’s banner. One death fit the heroic ideal of medieval monarchy, while the other appeared humiliating.
That contrast helped harden James III’s negative reputation. Yet history is rarely as tidy as reputation. James IV’s brilliance does not prove that his father deserved overthrow, and James III’s failures do not make his suspicious death less troubling.
A King Judged by His Enemies
Much of what makes James III appear strange comes from sources written by men who had little reason to defend him. Chroniclers repeated accusations about favorites, cowardice, poor government, family hostility, and inappropriate interests. Some of those accusations reflected real political problems. Others became exaggerated through repetition.
The social criticism of his favorites is particularly revealing. Describing advisers as masons, tailors, musicians, or other low-status men allowed aristocratic writers to present the king as violating the natural order. Their complaint was not necessarily that these men lacked intelligence. It was that they lacked birth.
Modern readers should therefore be cautious about accepting aristocratic outrage as objective evidence of incompetence. A king willing to promote talented men outside the hereditary elite might appear admirable from another perspective. The problem was political rather than simply moral. Fifteenth-century Scotland remained a society in which great nobles possessed military power the king could not ignore.
Likewise, James’s cultural interests were turned against him because they conflicted with expectations of martial masculinity. Later stories emphasized his reluctance to fight and fascination with astrology or music. Such details could be true without proving cowardice. Kings across Europe supported astrologers, musicians, architects, and scholars.
The strongest criticism of James rests not on those cultural preferences but on outcomes. He repeatedly failed to maintain stable relationships with major political groups. His brother rebelled, nobles killed his favorites, he was temporarily placed under restraint, and his son eventually became the figurehead of another rebellion. Those are substantial failures regardless of propaganda.
A balanced interpretation therefore requires holding two ideas at once. James’s enemies distorted his image, and James genuinely governed in ways that produced dangerous opposition. Correcting propaganda does not require pretending he was politically successful.
His assassination tradition emerged from the same contested memory. The men who overthrew him needed to justify rebellion, while later storytellers wanted to explain the mysterious death. Between propaganda and legend lies a king whose final moments remain frustratingly inaccessible.
What Sauchieburn Really Destroyed
The Battle of Sauchieburn destroyed James III’s reign, but it did not destroy the Stewart monarchy. That distinction explains much about the rebels’ strategy. They did not seek to replace the dynasty. They sought to replace one Stewart with another.
By controlling the prince, they ensured that royal legitimacy survived the king’s defeat. James IV could inherit immediately, preventing rival families from making serious claims. The rebels therefore achieved political change without creating a dynastic vacuum. It was an extraordinarily effective strategy.
The cost was the transformation of a family dispute into civil war. A teenage son became the banner under which armed men challenged his father. Scottish nobles killed one another while both sides claimed loyalty to legitimate monarchy. The battle demonstrated how flexible the language of allegiance could become.
James III’s death then removed the possibility of reconciliation. Had he survived, Scotland might have faced negotiations, imprisonment, deposition, exile, or renewed warfare. His existence would have complicated every claim made by the new regime. Death simplified everything.
This is why the exact manner of his death matters even though it cannot be established. If James was murdered after the battle, someone deliberately converted military defeat into permanent political settlement. If he died accidentally or from wounds, the rebels received the same benefit without direct regicide. The political outcome was identical.
Sauchieburn therefore destroyed more than one king. It destroyed the possibility that James III could repair his relationship with his son, reconcile with his nobles, or reshape his reputation through later success. His reign was frozen at its lowest moment.
The victors inherited the right to explain what had happened. James became the failed father and failed king whose removal allowed a more successful monarch to emerge. The dead rarely win arguments against governments built upon their defeat.
The King Who Vanished Between Battle and Murder
James III of Scotland did not die with the certainty that surrounds a public execution. There was no scaffold, no official sentence, and no reliable record of a final speech. He rode into the Battle of Sauchieburn as an anointed king and disappeared from history during the collapse of his army. By the time the political dust settled, his fifteen-year-old son wore the crown.
The mystery surrounding those final hours has helped define him ever since. Later chroniclers imagined or recorded a desperate flight, a frightened horse, a violent fall, a miller’s house, and a wounded king begging for a priest. Then came the final betrayal: a stranger claiming to be a clergyman approached the helpless monarch and stabbed him instead of hearing his confession. It is one of the most chilling stories attached to any Scottish king.
It may also be partly legend. The sources do not allow us to certify that sequence as fact. James may have died from injuries received in battle or during his flight, or he may have been deliberately killed under circumstances different from those later chroniclers described. The disguised priest remains a powerful tradition, not a proven historical identity.
Yet stripping away the uncertain details does not make James’s death ordinary. He was a king violently removed in a civil conflict led by nobles who possessed his heir. His survival would have threatened their victory. His death immediately secured the succession of the prince around whom they had organized.
That creates an unavoidable suspicion. Someone had every reason to make certain James did not escape. Whether that person was a rebel lord, a pursuing soldier, a local participant, or the mysterious false priest of later tradition cannot be established. The motive survived more clearly than the murderer.
James had spent his reign struggling with the political consequences of distrust. He distrusted powerful nobles because he had grown up watching factions control the monarchy. He relied upon favorites because their status depended upon him. He distrusted his brothers because one became a genuine rival for the throne.
His enemies responded with distrust of their own. They believed the king intended to exclude them, punish them, or elevate unsuitable men above them. At Lauder, they killed his favorites and seized his person. James survived that humiliation but never repaired the political relationship beneath it.
The final rebellion showed how far the conflict had deteriorated. The nobles no longer claimed merely to rescue James from bad advisers. They rallied around his son. The king himself had become the problem they intended to remove.
That transformation is the key to understanding Sauchieburn. A rebellion against favorites leaves room for reconciliation with the monarch. A rebellion organized around the monarch’s heir creates a replacement government waiting for the throne. Once Prince James stood among his father’s enemies, the political future no longer required James III to survive.
The king nevertheless gathered an army and fought. That fact should be remembered whenever later caricatures describe him as simply cowardly. Whatever his limitations, James understood that his crown could no longer be preserved through negotiation alone. He went to Sauchieburn knowing that defeat could end his reign.
When defeat came, he attempted to escape. There is nothing inherently dishonorable about a medieval king leaving a lost battlefield. A captured monarch could become a political weapon, while an escaped one could raise new forces. Survival itself was an act of strategy.
James never obtained that opportunity. Somewhere between the battlefield and safety, his escape ended. The king fell, was wounded, was killed, or suffered some combination of those events. The historical record becomes darkest at the moment when we most want it to become clear.
His son inherited the kingdom and eventually became one of Scotland’s greatest Renaissance monarchs. James IV’s success encouraged later generations to treat his father’s removal as almost necessary. A failed king had disappeared, and a brilliant one had replaced him. History could be made to look reassuringly purposeful.
But there was nothing inevitable about the transition. A father had gone to war against an army associated with his own child. Men who had sworn allegiance to one king fought so that another could replace him. The reigning monarch died before he could challenge their victory.
James IV apparently never escaped the moral shadow entirely. Traditions of his penance suggest that contemporaries understood Sauchieburn as something darker than an ordinary succession. The son may not have ordered his father’s death, but his rebellion created the circumstances in which it occurred. A crown inherited through violence carries questions even when the new king never wielded the weapon.
James III’s reputation also deserves something more than the verdict of his enemies. He could be politically clumsy, suspicious, and dangerously detached from aristocratic expectations. He also pursued diplomacy, patronized culture, strengthened royal imagery, presided over the acquisition of Orkney and Shetland, and imagined Scottish monarchy as part of a sophisticated European royal world. The king mocked for preferring artists and musicians was not necessarily foolish for valuing them.
His deeper failure was political isolation. Medieval kingship required more than royal authority; it required the cooperation of men capable of raising armies. James repeatedly allowed disagreement with those men to become mutual hatred. By 1488, enough of them preferred his teenage son to their reigning king.
That is what made the final battle possible. The mystery of his death began years before Sauchieburn, in courtrooms, councils, family disputes, forfeitures, favorites, and broken alliances. The supposed assassin’s knife, if it existed, was only the last instrument in a political collapse already far advanced.
The stories that grew around his death understood this instinctively. The fallen king does not die magnificently at the center of his army. He flees. His horse throws him. Strangers carry him into an ordinary house. He asks for spiritual comfort and receives betrayal.
Whether those details happened exactly that way is almost secondary to why they endured. They transformed James’s political isolation into a physical image. The king who had lost the loyalty of his nobles ended surrounded not by a royal court but by people whose intentions he could not know.
There is a final cruelty in the uncertainty. James spent much of his reign struggling to control how monarchy was exercised, yet he lost control even of the story of his own death. His enemies survived to govern, his son survived to become celebrated, and chroniclers survived to decide what kind of king James had been. James himself left no account of Sauchieburn.
We therefore cannot hear his version of the rebellion, his thoughts about his son’s involvement, or his memory of the moment his army broke. We cannot know whether he understood that his reign was over while he rode from the battlefield. We cannot know whether he recognized the person who killed him, assuming a killer existed.
What we can know is enough to make the story deeply unsettling. On the morning of June 11, 1488, Scotland had a forty-year-old king who had ruled since childhood. By the end of the crisis, that king was dead and his teenage son had inherited the throne through a rebellion conducted in his name.
James III had survived the seizure of his childhood government, the destruction of his favorites, imprisonment by his nobles, rivalry with his brother, and years of political hostility. He could not survive the moment when his enemies found a more useful Stewart than the king himself. At Sauchieburn, the crown did not fall with James because the rebels had already arranged for another head to receive it.
Perhaps James died from wounds. Perhaps he died from the fall of his horse. Perhaps a pursuing enemy recognized him and finished the work begun on the battlefield. Perhaps the old story is substantially true and a wounded king lying in a miller’s cottage asked for a priest only to watch his murderer enter the room.
History cannot tell us which final scene to believe with certainty, and pretending otherwise would diminish rather than strengthen the story. James III’s death remains suspended between documented political violence and an assassination tradition that may preserve the distorted memory of an actual murder. The uncertainty is part of what makes his end so haunting.
What is certain is that the king never returned from Sauchieburn. His enemies returned, his son returned, and the monarchy continued without him. Somewhere along the road from battlefield to refuge, James III ceased to be a king fighting for his throne and became a body whose death made everyone else’s political problem easier.
More than five centuries later, the question still follows him through the fields outside Stirling: did Scotland’s defeated king simply die while fleeing his last battle, or did someone find him before he could escape and make certain that James III would never wear the crown again? The rebels won Sauchieburn in daylight, but whatever happened to the king afterward belongs to the shadows—and it is there that the mystery of James III has remained.